Java Agent 01 搭建agent
创建一个java maven工程
Step1 添加bytebuddy及日志依赖
1 | <dependencies> |
Step2 书写Agent的入口处
agent有两个入口函数,分别是premain和agentmain,用于两种启动场景-javaagent启动场景和attach启动场景,我们这里先书写-javaagent启动场景
1 | package com.github.hezhangjian.demo.agent; |
这个时候Transform先书写一个空实现
2
3
4
5
6
7
8
9
10
11
12
13
14
15
16
17
18
19
import net.bytebuddy.agent.builder.AgentBuilder;
import net.bytebuddy.description.type.TypeDescription;
import net.bytebuddy.dynamic.DynamicType;
import net.bytebuddy.utility.JavaModule;
/**
* @author hezhangjian
*/
public class AgentTransformer implements AgentBuilder.Transformer{
public DynamicType.Builder<?> transform(DynamicType.Builder<?> builder, TypeDescription typeDescription, ClassLoader classLoader, JavaModule javaModule) {
return builder;
}
}
Step3 maven pom文件配置打包
2
3
4
5
6
7
8
9
10
11
12
13
14
15
16
17
18
19
20
21
22
23
24
25
26
27
28
29
30
31
32
33
34
35
36
37
38
39
40
41
42
43
44
45
46
47
48
49
50
51
52
53
54
55
56
57
<plugins>
<plugin>
<groupId>org.apache.maven.plugins</groupId>
<artifactId>maven-shade-plugin</artifactId>
<version>3.2.4</version>
<executions>
<execution>
<phase>package</phase>
<goals>
<goal>shade</goal>
</goals>
<configuration>
<transformers>
<transformer implementation="org.apache.maven.plugins.shade.resource.ManifestResourceTransformer">
<manifestEntries>
<Premain-Class>com.github.hezhangjian.demo.agent.AgentMain</Premain-Class>
<Can-Redefine-Classes>true</Can-Redefine-Classes>
<Can-Retransform-Classes>true</Can-Retransform-Classes>
</manifestEntries>
</transformer>
</transformers>
<artifactSet>
<includes>
<include>org.slf4j:slf4j-api</include>
<include>org.apache.logging.log4j:log4j-api</include>
<include>org.apache.logging.log4j:log4j-core</include>
<include>org.apache.logging.log4j:log4j-slf4j-impl</include>
<include>org.apache.logging.log4j:log4j-jcl</include>
</includes>
</artifactSet>
<filters>
<filter>
<artifact>*:*</artifact>
<excludes>
<exclude>META-INF/*.SF</exclude>
<exclude>META-INF/*.DSA</exclude>
<exclude>META-INF/*.RSA</exclude>
</excludes>
</filter>
</filters>
<relocations>
<relocation>
<pattern>org.slf4j</pattern>
<shadedPattern>com.github.hezhangjian.org.slf4j</shadedPattern>
</relocation>
<relocation>
<pattern>org.apache.logging</pattern>
<shadedPattern>com.github.hezhangjian.org.apache.logging</shadedPattern>
</relocation>
</relocations>
</configuration>
</execution>
</executions>
</plugin>
</plugins>
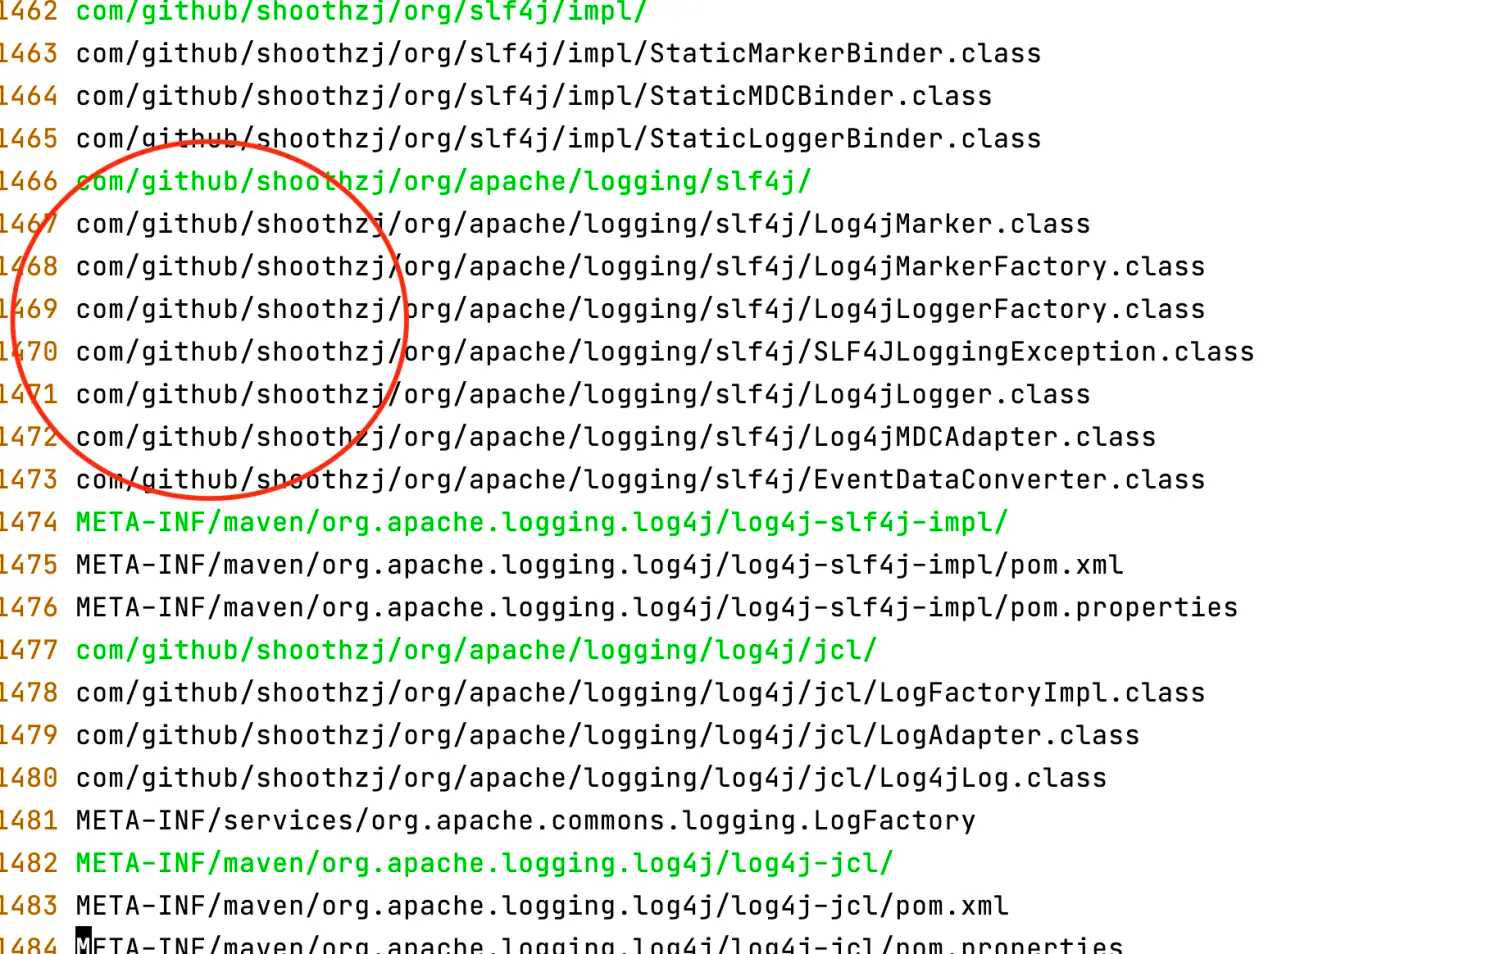
</build>这里配置了打java agent的包,和打shade包规避类冲突的问题,关于打shade包,可以参考https://www.jianshu.com/p/8171607ce03f
创建一个测试SpringBoot工程
Step1 书写主函数
1 | package com.github.hezhangjian.demo.agent.test; |
Step2 修改运行参数,加载java agent
这里我的agent,maven package后的路径在 /Users/akka/master/maven-demo/demo-agent/target/demo-agent-0.0.1.SNAPSHOT.jar
-javaagent:/Users/akka/master/maven-demo/demo-agent/target/demo-agent-0.0.1.SNAPSHOT.jar
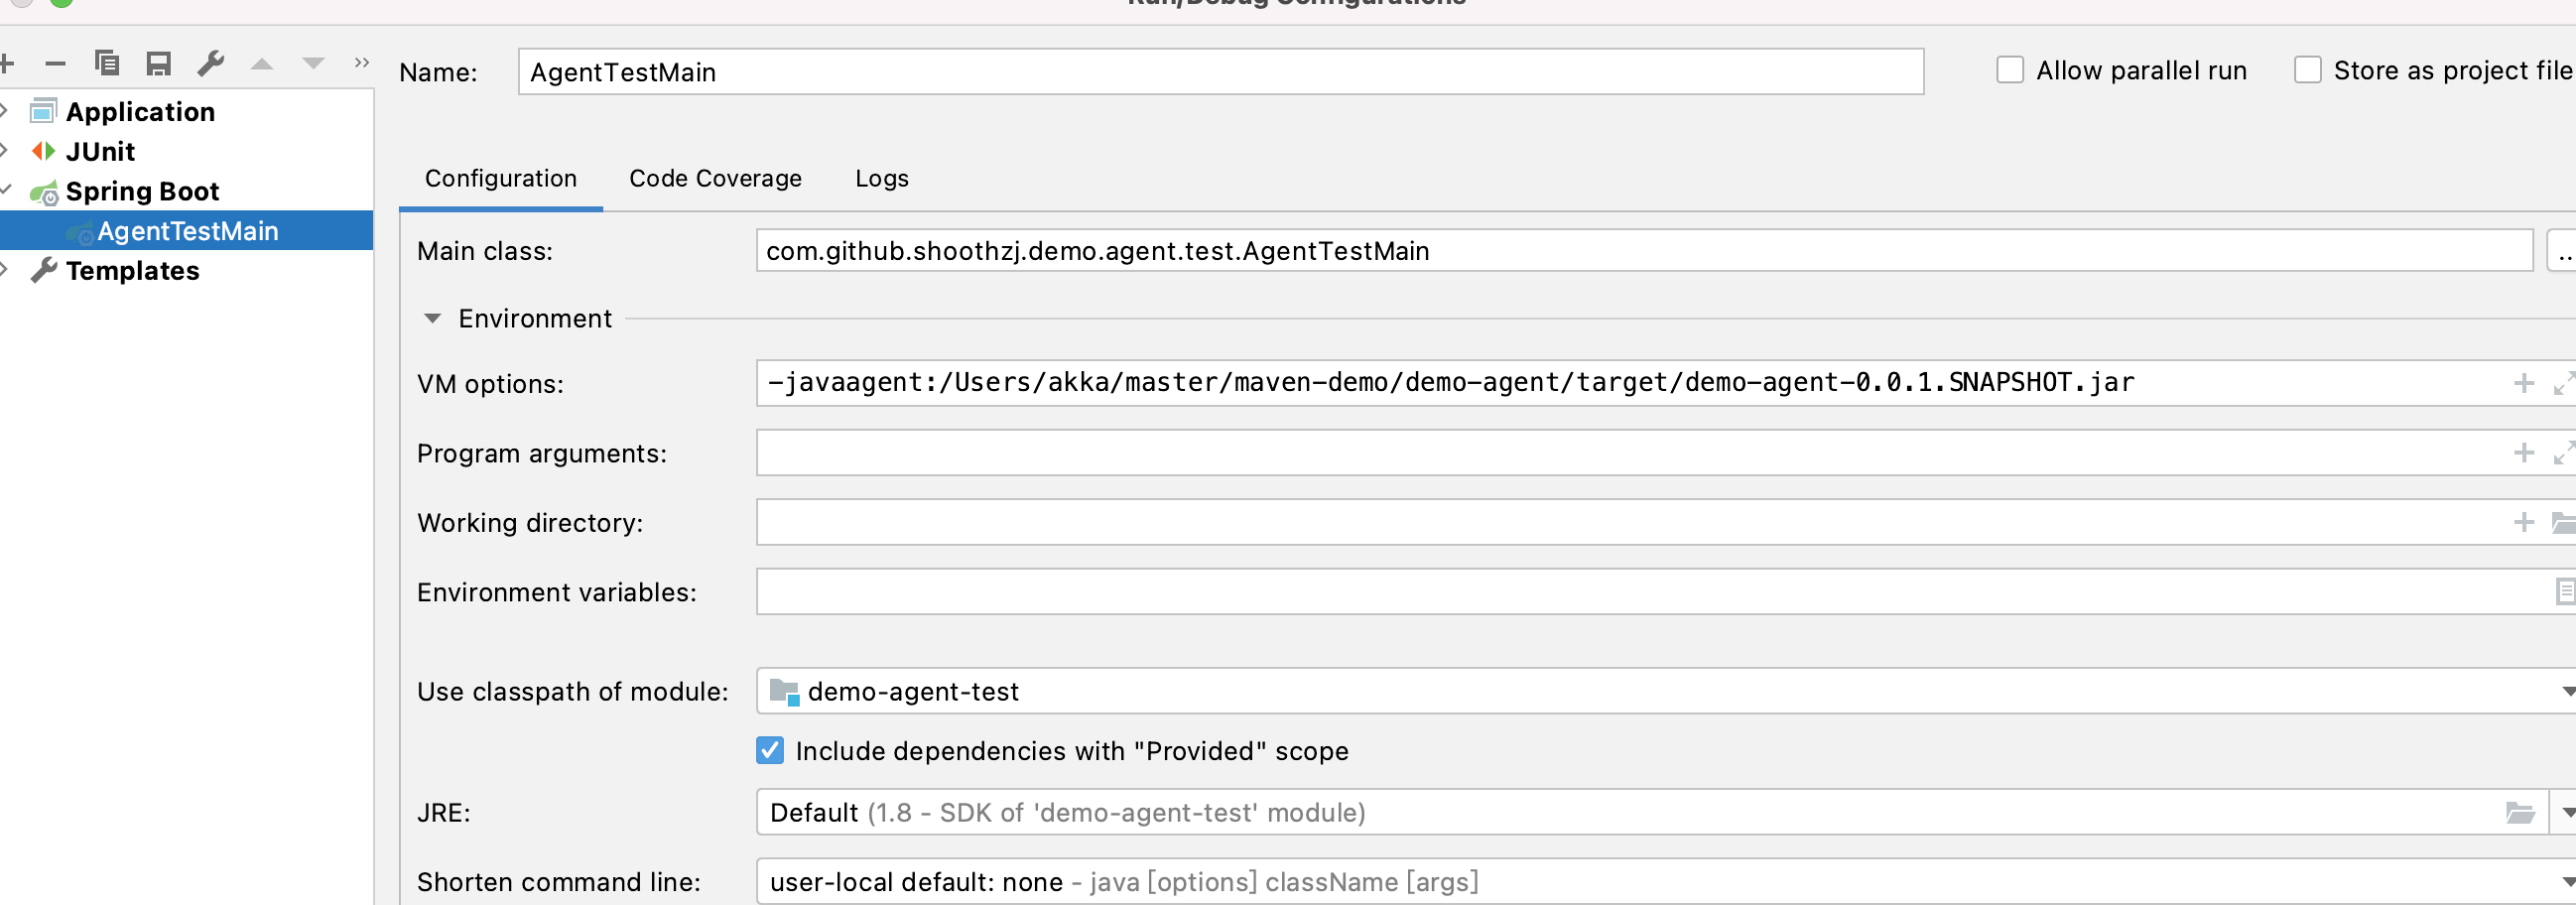
Step3 运行结果

可以看到agent已经正常启动